House Inspection NZ requirements can make many tenants nervous, especially when a property manager is checking every room against the original condition report. Even small cleaning issues can be noted during the inspection, and if enough areas fall below the expected standard, it could affect your bond refund.
The good news is that passing a house inspection is much easier when you know exactly what property managers look for. This complete guide walks you through every room of the home, highlights the most commonly missed cleaning tasks, and helps you prepare with confidence so your property is inspection-ready before handover.
House Inspection Cleaning NZ: What the Law Requires Before an Inspection?
Before touching a cloth, understand what you’re actually required to do.
Section 40(1)(e)(i) of the Residential Tenancies Act 1986 states that tenants must leave a property in a “reasonably clean and reasonably tidy condition.”
Three things this law means in practice:
- The standard is relative to how the property was when you moved in — not an absolute showroom standard
- Fair wear and tear is excluded — you are not responsible for it
- You are not legally required to pay for professional cleaning unless your tenancy agreement specifically includes that clause
What 'Reasonably Clean' Means for House Inspection Cleaning NZ?
Tenancy Tribunal decisions on cleaning disputes favour landlords in a majority of cases. Property managers use structured inspection checklists and compare the current condition against ingoing photos. The safest position is always to leave the property in very good condition regardless of the legal minimum.
IMPORTANT You are not legally required to pay for professional cleaning — unless your tenancy agreement specifically includes a professional cleaning clause. If it does and you signed it, it is enforceable. Always check your agreement before you start planning.
Before You Start — 4 Things to Do First
Doing these four things before you begin cleaning protects you legally and saves time.
Get your ingoing condition report
This document records the property’s condition when you moved in. Any damage, staining, or wear already present at the start is documented here. You cannot be charged for pre-existing issues. Request it from your property manager before your inspection clean.
Check your tenancy agreement for cleaning clauses
Many NZ tenancy agreements include specific clauses requiring professional carpet cleaning, window cleaning, or lawn maintenance. If your agreement includes these clauses and you signed it, they are enforceable. Check before you start so you can book what’s needed.
Take time-stamped photos before and after cleaning
Photograph every room, every surface, and every appliance before you start — and again after you finish. Date and time stamps are your evidence if there is any dispute.
Keep all receipts for professional services
Property managers can ask for proof of professional carpet or window cleaning. A receipt showing the address, service date, and method used protects you from disputed deductions.
Kitchen — The Most Inspected Room
The kitchen receives more attention at a New Zealand rental inspection than any other room. Work through every item below — don’t skip based on how something looks at a glance.
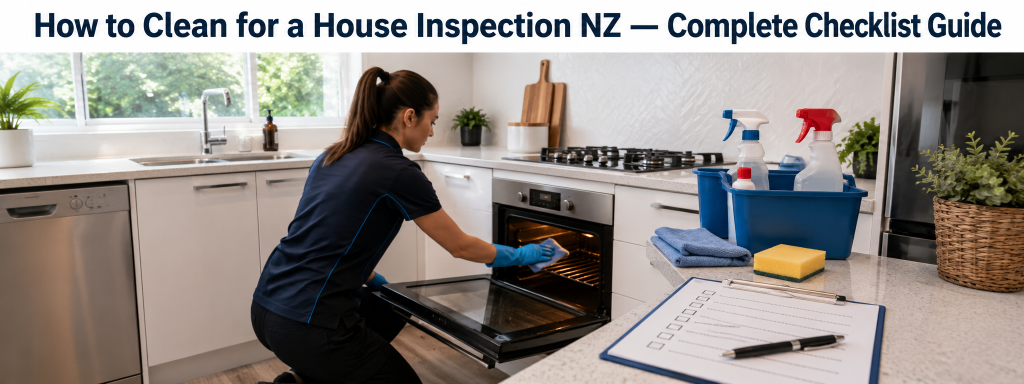
Oven and Cooking Appliances
The oven interior is the single most commonly failed inspection item across NZ rentals. Baked-on grease requires specific chemical treatment with proper dwell time — standard spray and wipe does not work.
PRO TIP: Apply oven cleaner the night before your clean day. Leave it to work overnight, then wipe out in the morning. This is the only approach that produces a genuinely clean result without hours of scrubbing.
Clean the following thoroughly:
- Oven interior — walls, base, and ceiling of oven cavity
- Oven racks — remove, soak in hot water and degreaser, scrub separately
- Oven door — outer glass, inner glass, and door seal
- Stovetop — surface, burner rings, drip trays, and between burners
- Control knobs — remove and clean underneath
- Rangehood exterior, interior, and filter
WATCH OUT: The rangehood filter is one of the most frequently failed items at inspection. Most tenants have never cleaned it during their tenancy. Soak it in hot water and degreaser for at least 20 minutes, scrub, rinse thoroughly, and allow to dry completely before replacing. If it is saturated beyond cleaning, a new filter costs $20–$50 — far less than a bond deduction.
Kitchen Surfaces and Storage
- All benchtops — wipe with the appropriate cleaner for your surface type (stone needs pH-neutral cleaner)
- Splashback tiles and grout lines
- Sink, taps, and under-rim of sink
- Sink drain — remove build-up from the drain opening
- All cupboards and drawers — empty completely, wipe inside shelves, drawer bases, and all door fronts
- Inside the pantry — all shelves, sides, and floor
Included Appliances
If the property includes a dishwasher, microwave, or refrigerator, these are inspected:
- Dishwasher — interior walls, door seal, filter, and spray arms
- Microwave — interior walls, base, turntable plate, door seal, and exterior
- Refrigerator — all shelves, drawers, door compartments, and door seal
- Freezer — defrost if required and dry completely before inspection
Bathrooms and Toilets
Bathrooms fail NZ inspections most often on mould, silicon seals, and extractor fan covers. These are the three areas most tenants overlook.
Shower and Bath
- Shower tiles — all surfaces and grout lines
- Shower screen or door — both sides, frame, and tracks
- Showerhead — descale if there is mineral build-up (soak in vinegar for one hour)
- Taps and mixer — descale and polish
- Bath — interior, taps, overflow cover, and exterior sides
- Silicon seals — inspect carefully for mould (see warning below)
- Shower curtain if applicable — wash or replace if mouldy
WATCH OUT: Mould in silicon seals cannot always be cleaned out — it grows into the silicon itself. If it doesn’t respond to mould remover after proper dwell time, the seal may need replacement. A poorly ventilated bathroom creates a maintenance responsibility — raise this with your property manager before your inspection.
Toilet
- Bowl interior — including under the rim, using a gel cleaner that clings to the surface
- Seat — both sides, hinges, and attachment points
- Lid — both sides
- Cistern exterior — all surfaces
- Behind and beneath the toilet — floor area around the base
- Toilet pipe — wipe down
Vanity and Bathroom Surfaces
- Vanity basin, taps, and benchtop
- Mirror — streak-free across the full surface including edges
- Vanity cupboards — inside and outside
- Towel rails — all surfaces
- All wall tiles and floor tiles including grout lines
- Extractor fan cover — remove, clean, and replace
- Bathroom ceiling — check for mould and treat if present
- Skirting boards in bathroom
- Light switch and power points
Bedrooms
Bedrooms are inspected for cleanliness of surfaces, condition of carpet, and the state of wardrobes and fittings.
- Ceiling fan — each blade, motor housing, and light fitting
- Light fitting — clean and replace any blown bulbs
- Ceiling corners — check for cobwebs throughout
- Walls — spot clean marks and scuffs, focusing around door handles and light switches
- All wardrobes — inside completely: shelves, rails, floor, and mirror doors on both sides
- Wardrobe exterior — doors, handles, and top edge
- Window sills, tracks, and frames
- Window glass — interior surface, streak-free
- Blinds — each slat wiped individually
- Skirting boards — complete perimeter of the room
- Doors — both sides, handle, lock, and top edge
- Door frames — both sides and top
- Light switches and power points
- Under the bed — move the bed fully out, vacuum and mop underneath
- Carpet — vacuum thoroughly in multiple directions
PRO TIP: Vacuum bedrooms last in your cleaning sequence — dust from wiping walls, wardrobes, and skirting boards falls to the floor. Vacuuming before these tasks means doing it twice.
Living Areas and Hallways
Living areas accumulate the most surface dust and are inspected closely for carpet and skirting board condition.
- Ceiling corners — cobwebs
- Ceiling fan and light fittings throughout
- Walls — spot clean throughout
- All skirting boards — complete perimeter of every room
- All doors — both sides, handles, and frames
- Window sills, tracks, frames, and interior glass
- Blinds or curtain tracks
- Fireplace if present — hearth, glass door, and surround
- Heat pump filter — remove, rinse under tap, dry, and reinstall
- All power points and light switches
- Hallway walls — common area for marks and scuffs
- Stair treads, risers, handrail, and balustrade if applicable
- Hard floors — sweep and mop
- Carpet — vacuum thoroughly
Laundry
The laundry is inspected quickly but specifically. The washing machine door seal is the most frequently failed laundry item.
- Washing machine — run a hot empty service wash before cleaning
- Door seal (rubber gasket) — clean thoroughly. Mould in the fold of this seal is extremely common and easy to miss on a visual check. Property managers know to look for it.
- Detergent drawer — remove and clean separately
- Dryer drum and lint filter
- Laundry tub, taps, and surround
- All laundry cupboards inside and outside
- Floor — sweep and mop
- Skirting boards in laundry
Windows Throughout the Property
Windows are inspected visually from both inside and outside. Clean every window in the property. For second-storey windows or any exterior glass you cannot safely reach, professional window cleaning in Christchurch handles both interior and exterior glass safely and to a streak-free standard.
- Interior glass — streak-free across all windows
- Window sills — full surface including all faces
- Window tracks — vacuum with a crevice tool first, then wipe clean
- Window latches and handles — wipe down
- Window frames — interior faces
- Flyscreen — remove, rinse under tap, replace when dry
- Exterior glass where accessible from ground level — both sides
WATCH OUT: Window tracks are one of the most commonly overlooked items at inspection. They accumulate soil, dead insects, and grime that is immediately obvious to an experienced property manager. Vacuum them first, then use a damp cloth for residue.
Garage and Outdoor Areas
Outdoor areas are often left until last and cleaned under time pressure. Garage floors and outdoor spaces fail inspections more often than tenants expect.
Garage
- Floor — sweep completely. Oil or grease stains require degreaser and scrubbing, not just sweeping.
- Walls — remove cobwebs and wipe visible marks
- Shelving if provided — clear completely and wipe all shelves
- Power points and light switches
- Remove all personal belongings — do not leave anything behind
WATCH OUT: Oil stains on garage floors are a specific inspection fail point. A concrete degreaser and stiff brush is the correct approach. If the stain is large, discuss with your property manager before handover.
Outdoor Areas
- All rubbish and recycling removed — bins emptied
- Paths and driveway — sweep and treat any green algae if present
- Deck or patio — sweep and wash down
- Lawn — mow if required by your tenancy agreement
- Garden — weed if specified in your agreement
- Exterior light fittings — remove cobwebs from accessible fittings
The 10 Most Commonly Failed Items in NZ House Inspections
Based on the cleaning work Mr. Cleaner carries out across Christchurch rentals, these are the items that cause bond deductions most frequently. Go through this list specifically before your inspection.
Fail Item | Why It Gets Missed |
Rangehood filter | Never cleaned during tenancy. Saturated with grease. |
Oven interior | Needs overnight chemical dwell time most DIY cleans skip. |
Window tracks | Glass gets cleaned. Tracks get forgotten entirely. |
Wardrobe interiors | Out of sight during regular cleaning throughout tenancy. |
Skirting boards in wardrobes and laundry | Done in main rooms, skipped everywhere else. |
Bathroom silicon seals | Mould grows into the seal, not just on the surface. |
Extractor fan covers | Rarely removed or cleaned during a tenancy. |
Garage floor oil stains | Not noticed until everything else is cleared out. |
Washing machine door seal | Mould in the rubber fold is hard to spot visually. |
Tops of interior door frames | Nobody looks up during a standard cleaning routine. |
How to Clean for a House Inspection NZ — Timeline?
4 Weeks Before Inspection
- Request your ingoing condition report from your property manager
- Read your tenancy agreement for cleaning clauses
- Book professional carpet cleaning and window cleaning if required by agreement
- Begin defrosting the freezer if it has significant ice build-up
1–2 Weeks Before Inspection
- Apply oven cleaner and leave to soak — repeat over several days for best results
- Begin treating bathroom mould — requires dwell time and repeat applications
- Wash curtains if machine washable — needs drying and rehanging time
- Spot clean walls and doors as you notice marks
2–3 Days Before Inspection
- Deep clean kitchen — oven, rangehood, cupboards, and appliances
- Deep clean all bathrooms
- Clean all windows, tracks, and sills throughout the property
- Clean all skirting boards throughout every room
- Wipe all doors, frames, light switches, and power points
The Day Before Inspection
- Professional carpet cleaning if booked — allow 4–6 hours minimum drying time
- Professional window cleaning if booked
- Final vacuum of all floors
- Final mop of all hard floors
- Take time-stamped photos of every room after cleaning
Day of Inspection
- Remove all remaining belongings from the property
- Remove all rubbish and recycling
- Do a final walk-through with this checklist
- Return all keys, remotes, and access devices
- Take final photos at the point of handover
- Request written confirmation of handover from your property manager
DIY vs Professional Cleaning for an Inspection
You can clean for a NZ house inspection yourself. Many tenants do this successfully. But there are specific situations where professional help is clearly the better choice.
When DIY Works Well
- The property is small and has been consistently well maintained
- You have the right products — oven cleaner, bathroom descaler, mould remover
- You have at least one full day available — a proper inspection clean on a 3-bedroom property takes 8–10 hours minimum
- Your tenancy agreement does not require professional services
When Professional Cleaning Makes More Sense?
- Your tenancy agreement requires professional carpet cleaning or window cleaning
- The property has built-up oven grease, bathroom mould, or stained carpet
- You are on a tight timeline with work and moving commitments
- The property is large or has been in heavy use
- You want a guarantee — professional cleaners return to re-clean at no charge if anything is flagged
Service | Approximate Cost |
Professional 3-bedroom inspection clean | $380–$600 |
Professional carpet clean (3 bedrooms) | $180–$300 |
Bond deduction for incomplete cleaning | $200–$800+ |
Tenancy Tribunal filing fee (if disputed) | $20.43 + time cost |
When the cost of professional cleaning is similar to or less than a potential bond deduction — and professional cleaning comes with a guarantee — the decision is straightforward for most tenants. Mr. Cleaner’s bond cleaning service in Christchurch covers the full property in one visit.
What Happens if You Fail the Inspection?
If your property manager identifies cleaning issues at the final inspection, you will receive written notice of any bond deductions being claimed. At that point:
Step 1
Compare every claimed item against your ingoing condition report. If the issue was pre-existing and documented, you are not responsible for it.
Step 2
Check whether each item is a genuine cleaning issue or normal wear and tear. Faded paintwork, worn carpet in traffic areas, and minor scuffs are not your financial responsibility.
Step 3
If you disagree with a deduction, you have the right to dispute it. You and your property manager complete a bond refund form for amounts you agree on. Disputed amounts go to the Tenancy Tribunal.
Step 4
If the claim is legitimate, it is almost always cheaper to arrange for that specific item to be rectified than to go through the Tribunal process.
KEY POINT The Tenancy Tribunal is accessible and not a last resort. The filing fee is $20.43 and most hearings resolve in under an hour. If a deduction is unfair and you have documentation to support your position, applying is entirely reasonable.
Need Help Cleaning for Your House Inspection in Christchurch?
If this checklist feels like more than you can manage before your inspection date, Mr. Cleaner’s professional inspection and bond cleaning service covers everything your property manager checks — across all Christchurch suburbs.
Our team works from the same checklist your property manager uses. We cover kitchens, bathrooms, bedrooms, living areas, windows, and carpets — and we return at no charge if anything is flagged at inspection.
Services Available
GET A FREE QUOTE — NO OBLIGATION, NO LOCK-IN
Address: Christchurch, New Zealand
Phone: 022 107 3435 | 022 019 5919
Email: info@mistercleaner.co.nz
Website: mistercleaner.co.nz/contact-us
We cover all Christchurch suburbs — Fendalton, Merivale, Halswell, New Brighton, Papanui, Riccarton, Cashmere, Addington, Hornby, Wigram, St Albans, Shirley, and everywhere in between. Same-week bookings available in most areas.